Category Archives: Repair

HP 3325B Function Generator

I saved a HP3325B from the trash almost 6 months ago which is an awesome score.  When I had first powered it up it threw a FAIL 023 error, I put it under my desk and decided to get it out and patch it up today.

First key bit of information is that HP / Agilent are absolutely spectacular companies for providing service manuals, product manuals, and datasheets well beyond the retail life of their instruments.  You can still pick up documentation directly from Agilent here.

In digging through the datasheet you can see that a FAIL 023 means we’re having a problem with the dc offset, so I printed off the relevant service information (groups K,J) and prepared for the worst.  After powering the machine on at my desk I was again met with the FAIL 023 when requesting a sine wave, and a new error was a FAIL021 when requesting a square wave.  I then out of chance cycled through the other 3 settings (triangle, etc) and returned to the square wave and sine waves to discover that the errors had went away!  It’s likely that I had a stuck/hung up relay and switching away from square and sine waves cycled something into place again.  We’ll see how long it lasts but hopefully I’ve just picked up a nice piece of equipment.

Additionally while I was reassembling the covers, turning the instrument from side to side resulted in a nice pinball sound, I swung it back in forth until I was greeted with 3 washers on my desk, I can’t imagine that these were helping with things but they’re out now.  Looks like they came off the main power transformer which someone had helpfully duct-taped into place at some point.
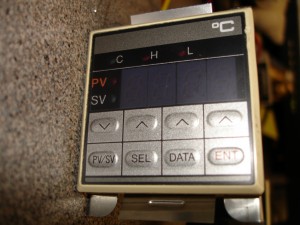
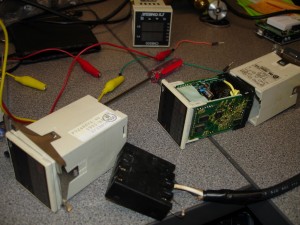
Fuji PYZ Series PYZ4RAY1-4V Controller Dead

I’ve got 3 PYZ series PYZ4RAY1-4V controllers who have all decided to quit working in a week or so of eachother.

Fuji PYZ Controller

Fuji PYZ Controller

They all won’t respond correctly to the sense input (TC, RTD, Voltage/Current) and 2 of them are stuck at -208 no matter what. I don’t see any glaring issues on the boards, the capacitors are all happy, nothing burned out/damaged. Can’t find any reference to them on the internet except for a manual here.

I’ve also got an Omega CN8500 with similar issues.

Anyone else familiar with these controllers?

Fuji PYZ Controller

Lots of Fuji PYZ Controllers

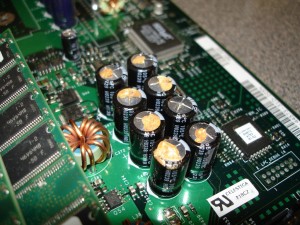
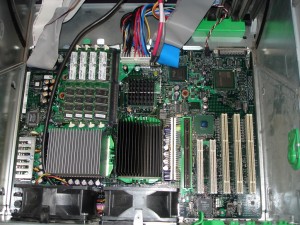
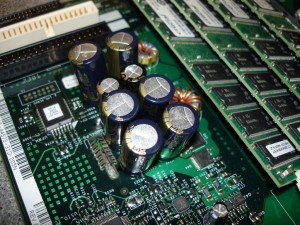
Dell Precision 650 Bad Capacitors

I was given a full Dell Precision 650 that wasn’t booting. In taking a glance at it, it was obvious what was wrong with the poor thing:

Bad/Leaky Capacitors

Bad/Leaky Capacitors

Dell Precision 650 Motherboard

Dell Precision 650 Motherboard

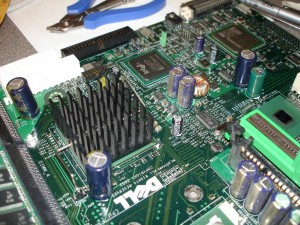
I pulled the motherboard and swapped all of the electrolytics out for known good capacitors.

Good Capacitors

Good Capacitors

After swapping out all of the bad capacitors it fired up like new!

Lots to replace!

Lots to replace!

Wii Power Brick Screws

First:  Your power brick is most likely NOT broken, don’t waste your time opening it up, instead unplug it, go outside and run around for 15 minutes, come back and plug it in and see if it’s now magically fixed!   (Shortcut is to unplug it and short out the output to drain the capacitors in the power supply, making damn sure it’s unplugged before doing so so you don’t actually pop the fuses)

On with the opening up step if you’re still not convinced. . .

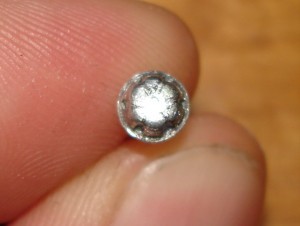
If you’re wondering how to open a Nintendo Wii power supply brick you’re in luck. For some reason my Wii wouldn’t power on at all last night, no red, yellow or green lights on the console, nothing. I grabbed my trusty Harbor Freight multimeter and checked the power supply output. Nothing. Next up was to open up the power supply and find out if my power brick had suffered from a blown fuse. Of course, Nintendo put proprietary screws on the power brick to prevent someone from opening it, and of course they weren’t tri-wing, they’re some nutball spanner screw heads. The good thing is that they’re a terrible “tamper proof” head, as they put the dimples directly opposite of each other (even number of engagement points).

Wii Power Supply Screws

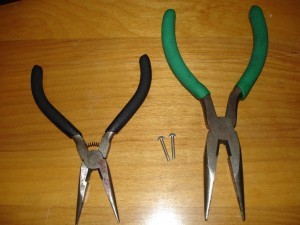
If you want to build a truly pain in the ass fastener you need to have features that don’t line up, typically by using an odd number of engagement points, like the tri-wing screws they use on the console. Just grab a pair (or two) of needle nose pliers

Needle Nose Pliers

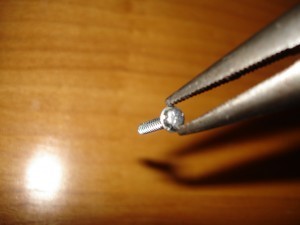
And span the screw with the tip of the pliers, apply force to engage the pliers in the dimples and then carefully twist left. You should be able to see the screws almost immediately rise away from the supply. The good thing is they used correct, coarse threaded high angle plastic screws so it’s only about 4 turns to get them out of the supply.

Span the Screw with Pliers

The annoying thing is that the fuse wasn’t burned out on the supply, nor was there anything else wrong with it. It definitely smells like hot plastic/capacitor electrolyte in there, and they’re using lead free solder and don’t have the best joints I’ve seen, but nothing major. I’m thinking the supply may have not started up correctly and therefore shut it self off (there are some optocouplers on there to detect if the supply is operating correctly and feed back to the mains side of the supply). So most likely by me unplugging it and the time it took to disassemble “fixed” it, otherwise there may be a dry solder joint in there that was flexed the right way to remake contact while I was taking it apart. YMMV

Nintendo has a remarkably useful write up here regarding resetting the Wii power supply.

RIP Dremel XPS

Well, all good things must one day die. . .  the dremel decided to start smoking and burning my hand while I was cutting out a mounting plate for an RC airplane.  There was no heavy loads, long operating times, or abuse in the life of my dremel tool.  It was barely used on the odd job for the last 2 years but appeared to suffer a meltdown this afternoon.  A post mortem investigation is pending.

UPDATE
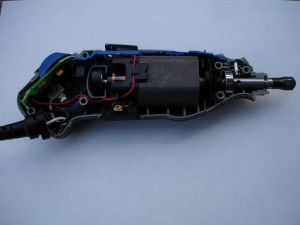
I disassembled the dremel to find nothing too obvious dead with it.

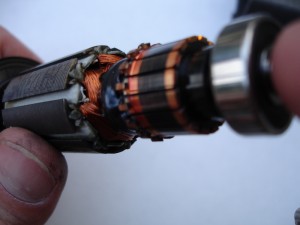
The rotor definitely overheated by the looks of the plastic dripping out the sides near the rotor windings. . .

Figuring that I don’t have anything to lose besides letting a little more smoke out I decide to reassemble and plug it back in.  It seems to have straightened itself out over the course of disassembly/reassembly.  I’m betting that the carbon brushes were dirty and causing excess arcing by the looks at the commutator (copper thing at the right of the rotor pictured above with the nice black wide line on it).  We’ll see how long it lasts until I need call the Dremel company

42″ Plasma Screen!

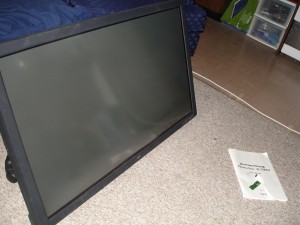
My brother is a Craigslist hawk and e-mailed me a plasma screen monitor in need of some love.  As it turned out, the screen had been at a repair place that went out of business and this guy picked it up from a friend of his who worked there.  The flat flex cable that ran from the front panel to the remote IR pickup was destroyed at some point when it was apart and he didn’t know how to fix it – so he wanted $100 and his garage space back.

Turns out the cable is a 1mm pitch 12 position flat flex cable, something that Digikey sells for $4.18.  There is of course a new cable in the mail and I should have it fixed by this next weekend 🙂

42\" NEC Plasmasync Monitor

Finally Gave Up on My Nexus Jaguar Amplifier

. . . from 6 years ago

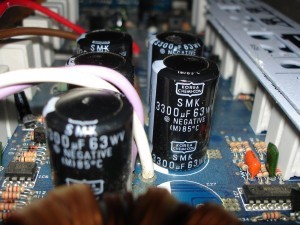
I bought a “stereo” from another guy at high school composed of a Digital Designs 15″ subwoofer and a Nexus Jaguar 1100 watt amplifier when I was a sophomore in high school. I’ve been digging through the electronics off and on for the last couple of years. I finally got it out again yesterday and immediately noticed that the bank of 6 power filter capacitors in the center were pretty bulgy. I tried desoldering them (with the aid of a 1500W heat gun to “preheat”) and to no avail, I got a single capacitor out with the through hole plating still stuck to the legs – so that pad is dead. . . I took a look online to find the cheapest substitute was about $35/each and quickly realized that this wasn’t worth it at all.
The curse of bulgy capacitors strikes another electrical item

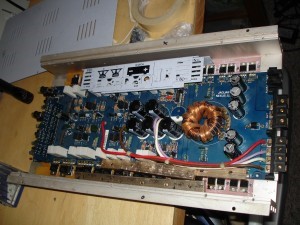
The amplifier in all of its glory

So the former neighborhood terrorizer will be surrendered into the “spare parts bin” to live on in whatever may need parts off of it.