First: Your power brick is most likely NOT broken, don’t waste your time opening it up, instead unplug it, go outside and run around for 15 minutes, come back and plug it in and see if it’s now magically fixed! (Shortcut is to unplug it and short out the output to drain the capacitors in the power supply, making damn sure it’s unplugged before doing so so you don’t actually pop the fuses)
On with the opening up step if you’re still not convinced. . .
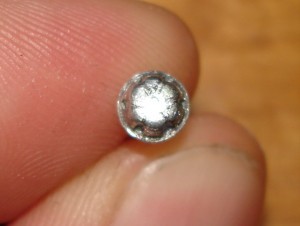
If you’re wondering how to open a Nintendo Wii power supply brick you’re in luck. For some reason my Wii wouldn’t power on at all last night, no red, yellow or green lights on the console, nothing. I grabbed my trusty Harbor Freight multimeter and checked the power supply output. Nothing. Next up was to open up the power supply and find out if my power brick had suffered from a blown fuse. Of course, Nintendo put proprietary screws on the power brick to prevent someone from opening it, and of course they weren’t tri-wing, they’re some nutball spanner screw heads. The good thing is that they’re a terrible “tamper proof” head, as they put the dimples directly opposite of each other (even number of engagement points).
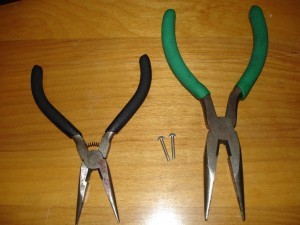
If you want to build a truly pain in the ass fastener you need to have features that don’t line up, typically by using an odd number of engagement points, like the tri-wing screws they use on the console. Just grab a pair (or two) of needle nose pliers
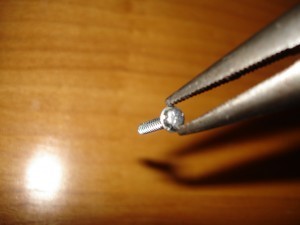
And span the screw with the tip of the pliers, apply force to engage the pliers in the dimples and then carefully twist left. You should be able to see the screws almost immediately rise away from the supply. The good thing is they used correct, coarse threaded high angle plastic screws so it’s only about 4 turns to get them out of the supply.
The annoying thing is that the fuse wasn’t burned out on the supply, nor was there anything else wrong with it. It definitely smells like hot plastic/capacitor electrolyte in there, and they’re using lead free solder and don’t have the best joints I’ve seen, but nothing major. I’m thinking the supply may have not started up correctly and therefore shut it self off (there are some optocouplers on there to detect if the supply is operating correctly and feed back to the mains side of the supply). So most likely by me unplugging it and the time it took to disassemble “fixed” it, otherwise there may be a dry solder joint in there that was flexed the right way to remake contact while I was taking it apart. YMMV
Nintendo has a remarkably useful write up here regarding resetting the Wii power supply.


same problem,but after I took mine apart I don’t see anything that looks like a fuse.Where is it or what does it look like? Pix?Help please!
I didn’t end up needing to replace the fuse or anything else, just the time it took to take apart “reset” the power adapter so it worked again when I plugged it back in. These guys have a picture here:
http://diy.sickmods.net/images/wii-psu-5.jpg
My Wii PSU was not giving 12V DC output, even after disconnecting at input and output and waiting 10 mins.
I managed to remove the 2 screws and get inside this US Wii PSU that I was operating off a 240/120V step down transformer.
The 110 V AC input is White and Black leads.
The White lead connects to a Resistor (Blue/Brown/Blue/Gold/Blue?)
I = V/R = 120/61 = 2A 61 ohm Resistor – too small for high wattage, or is it be 61 MOhm, but that would be 2 micro Amp?
I can’t get a Ohm reading on my cheap multimeter, so is it high or blown?
The Black Lead connects to F1, 2.5A 250V, connecting to a Bridge Rectifier, and was open circuit!
I pressume this is a bi-metallic link, thermal fuse, that no longer making contact, after cooling down?
So I am hoping if that is replaced with a similar Fuse (or fitting a standard fuse wire), it may work again.
Anyone know the circuit differences for 100-240V Wii PSU’s?
Could such 110V PSU be ‘modified’ to work off 220V, like changing Resistor Vale?
The Wii power supply is a switch mode supply, which means that the power comes in, gets stepped down through atransformer and then there are some power electronics that very quickly switch on and off to generate the 12VDC output the Wii runs off of. Usually, which doesn’t seem to be the case for the Wii, power supplies are designed to work off of 100VAC-240VAC to cover the world power spectrum without having to change any of the electronics, these supplies are clearly labeled with a wide input voltage on the case. The Wii power supply specifically states 120VAC, so don’t try plugging it into higher voltage or vice-versa unless someone else has already done it and confirms that it works.
Because the output voltage is dependent on the input voltage and the transformers/etc all being specified for the input voltage there isn’t really any way you can change the supply to run off of higher voltage by simply switching resistors or something. Sounds like you’ve found a bad fuse inside the supply, try bridging it (saves the time desoldering/resoldering) with a replacement 2.5A fuse rated for 120+V and see if it works then, if it doesn’t look at picking up a new supply for $20
You can ‘re-wire’ the transformer so it takes 220V input. At least I’ve done that multiple times on power bricks that takes only 120V. But now days, I guess a professional to do that would charge more than $20.
Thanks for the post. I found the same symptoms, and found a 3rd party replacement for <$10. Was about to order, then found your post. Now, I saved time and money… Good work!
thanx 4 ur help. left it unplugged and it powered up. saved me some $$$$ thanx so much.
Thanks Chris, I thought our WII had died ( two weeks after the warranty expired of course ). I tested to brick and found out it was no longer supplying power to the WII, I was looking to replace mine and I found your site. I tried the shortcut and now it is working again thanks to you.
THANKS SO MUCH FOR THE TIP !
My WII went to Germany and was plugged into their outlet and it got fried. Openned the brick and saw the burn marks. I checked the fuse with my ohm meter and it was an open circuit. So I’m fairly certain that the fuse did its job. What I don’t know is what kind of fuse it is. What should I be asking for? I know what amp and volt it is but not what kind of fuse it is. Your help is greatly appreciated.