Friendess BCS100 Fiber Laser Capacitive Height Amplifier

THIS IS UNTESTED CURRENTLY – DO NOT PUT THIS INTO USE WITHOUT VETTING THE INFORMATION YOURSELF!

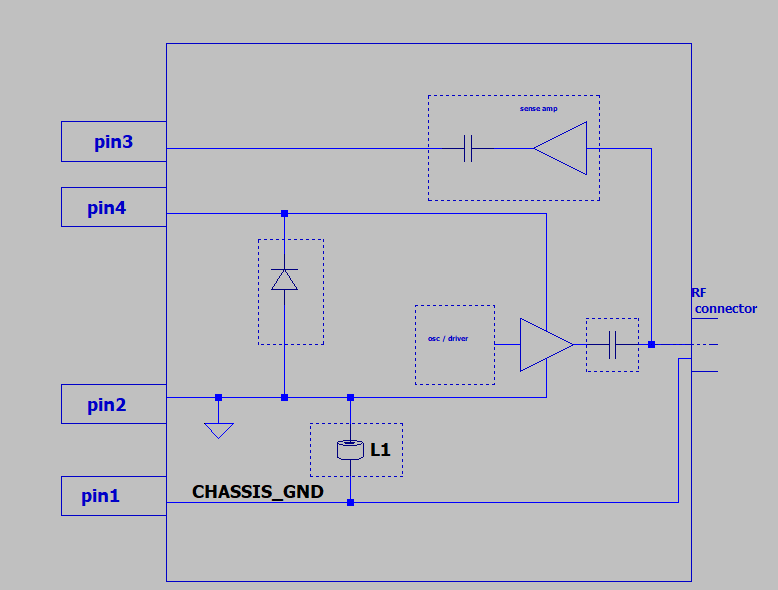
We purchased a BCS100 fiber laser amplifier despite it not having a documented pinout so we can connect it up to LinuxCNC and use it for height control on a DIY fiber laser build. So far here’s our best guess at an electrical schematic:

Thanks Ken for your expertise as always!

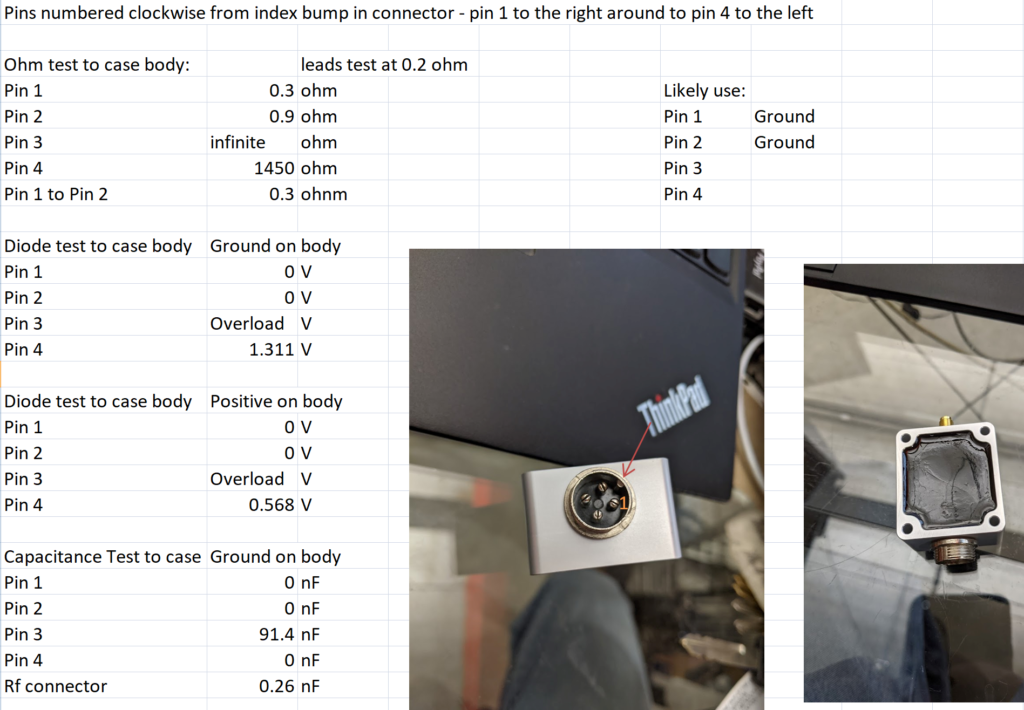
Based on some preliminary tests:

Note the arrow aimed at the connector index, pin 1 to the right

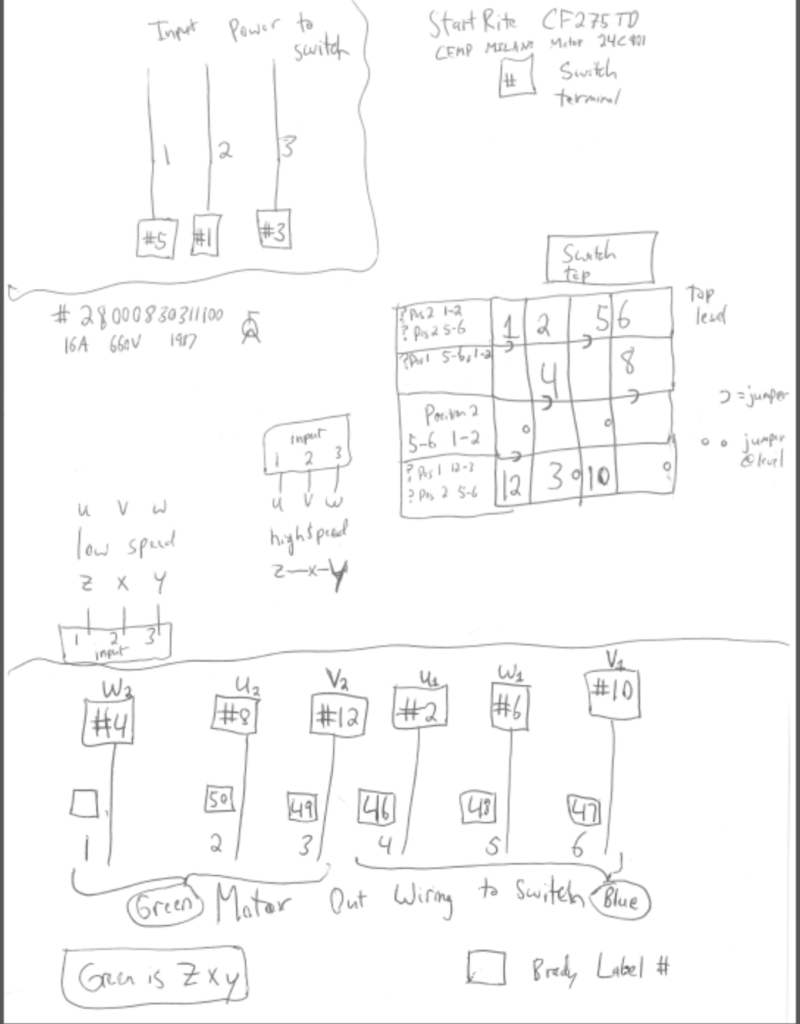
Startrite CF275TD Cold Saw Wiring Schematic

If you have additional information on this saw please contact me and I’ll post it here as well, there isn’t a lot of information out there. I had to debug the electrical to figure out why our high speed operation wasn’t working. It turned out to be a broken wire that got pinched under the ground screw in the motor housing but before I figured that out I traced the full schematic. Hopefully it’s of some benefit to someone else.

Keyworks: Startrite CF275TD Motor CEMP MILANO 24C901 Drum Barrel Switch 28000830311100

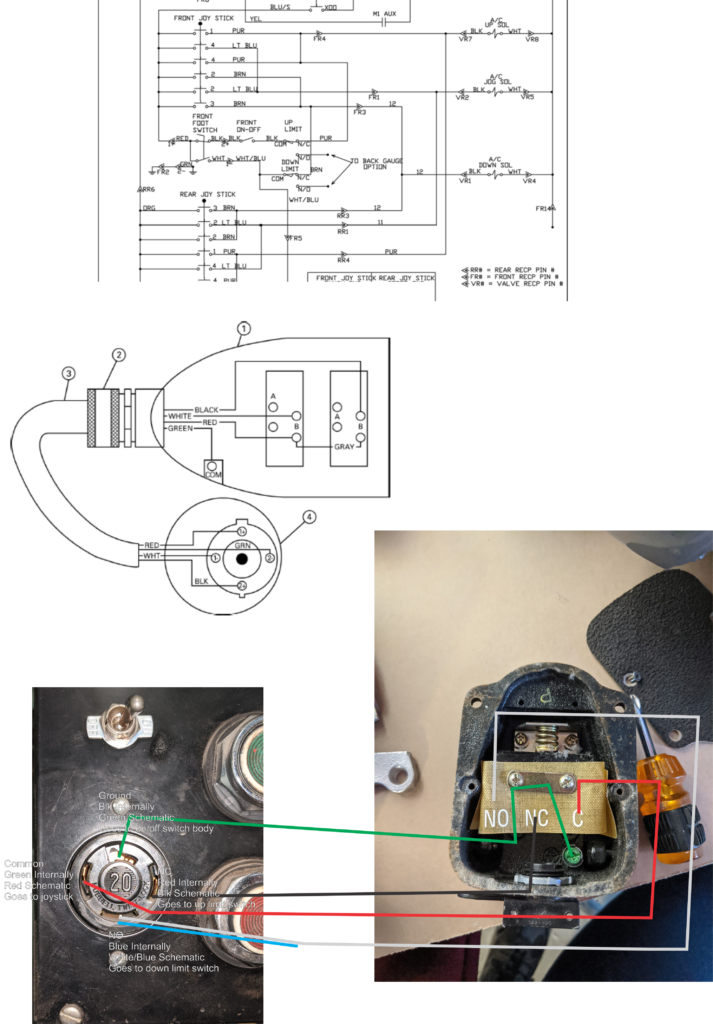
Piranha P50 Pedal Pinout

We have a Piranha P50 ironworker and we wanted to get a pedal working to augment the joystick controls. Piranha is nice enough to release real machine information including full electrical schematics and information but when we went to implement a pedal it wouldn’t work. Our pedal plug didn’t match the pictures in the instructions, but our wiring appeared the same. Long story short, after pinning out the wires and tracing things around it turns out the schematic wire colors don’t match with how our machine was built.

The other thing worth noting is the manual refers to the 3 position pedal, the supports down, up, and neutral (stopped), we only have a 2 position pedal (single throw, double pole momentary switch) so we wanted the ram to either be running down to the limit or up to the limit at all times.

You might have to click on or download the picture to have a better sense of the wiring. Please make sure you check your machine, it might not be wired the same at all. Also read and understand all of the warnings associated with operating the Piranha press with a pedal, the machine *will* move unexpectedly at startup if the pedal is connected and switch is not off.

Repair a Broken Tip For A Tormach PCNC Touch Off Probe

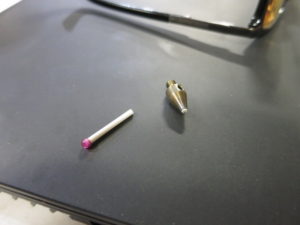
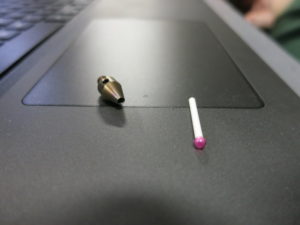
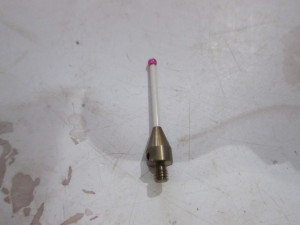
If you have a Tormach PCNC machine with their passive touch off probe you’re bound to break the tiny ceramic tip at some point. There’s two strategies, one is to buy a new one with a carbide or stainless steel tip but then if you crash it you might damage the probe itself – the alternative is to upgrade to a thicker boss by purchasing a non-Tormach replacement. Either of those doesn’t help you with your current problem – finishing the job you started with a non-broken tip!

I ended up trying to drill out the broken off chunk of ceramic with carbide tooling but to no avail. What did work great was heating up the probe tip with the broken ceramic stuck in it with a propane torch, the glue burns off and the broken ceramic chunk will fall out. You can then superglue whatever you’ve got left of the tip back in. Of course you’d think this would mess up the precision of the tool but that’s why you have to calibrate the probe in the first place, because it’s not glued in precisely initially.

Once your probe breaks off:

Add heat with a propane/butane torch:

Reglue the remaining tip into the socket with some super glue:

IMG_9251

Slightly shorter and the stainless steel is a little crispy looking – but it works fine!

Go forth and save your $90 on the replacement, at least for the first time until it ends up too short!

RepRap gcode using MeshCAM

Warning – this post was sitting in the drafts, I don’t know how helpful it’ll be but it’s been sitting for 5 years – may as well release the information and hope it helps someone.

***

If anyone out there is running the RepRap / Makerbot gcode intrepreter for a CNC dremel / router / etc and is trying to use MeshCAM here’s some instructions:

Use MeshCAM as usual, but you’ll want to use this post script (you probably don’t actually need to print all of the XYZ commands when you’re not moving them, but it doesn’t hurt to do it, hence the @ rather than #):
; MeshCAM config
; This config is the basis for the minimum
; gcode output. If you're looking for
; the shortest output file then this is the config
; to start with. Also show how to integrate CutViewer config into
; the output.
;
; 2/29/04 Changed comments to be enclosed by () rather than start with ;
; Added CutViewer config output
; 5/13/04 Added toolchange gcode
; 2/12/05 Changed name and added units
; 3/17/05 Changed stock definition to use CUTVIEWERSTOCK variable
; 5/19/05 Removed feedrate command for rapid moves
; 5/25/05 Added dummy tool for CutViewer
; 6/27/05 Changed the formats to 1.4 to get 4 decimal places of accuracy
;
DESCRIPTION = "RepRap GCode-MM(*.nc)"
FILE_EXTENSION = "nc"
UNITS = MM
;Feeds
FORMAT = [F|@|F|1.1]
;Moves
FORMAT = [X|@|X|1.4]
FORMAT = [Y|@|Y|1.4]
FORMAT = [Z|@|Z|1.4]
;
START = "%"
START = "(FILENAME: [FILENAME])"
; The following is a dummy tool to keep CutViewer from generating an error when G20 is called without a tool
START = "(TOOL/MILL,0.1,0.05,0.000,0)"
START = "G21 ;Metric is good"
START = "([CUTVIEWERSTOCK])"
START = "G90 ;Absolute Positioning"
;
FIRST_RAPID_RATE_MOVE = "G0 [X] [Y] [Z] [F]"
RAPID_RATE_MOVE = "G0 [X] [Y] [Z]"
;
FIRST_FEED_RATE_MOVE = "G1 [X] [Y] [Z] [F]"
FEED_RATE_MOVE = "G1 [X] [Y] [Z]"
;
END = "(END)"
END = "(OF PROGRAM)"

Here’s a text version, make sure to rename the extension to .con and put it in your posts folder in the MeshCAM installation directory

RepRap gcode-MM

Next up, open your STL/etc file, set up your tooling, and then the important part:

Your RepRap will not allow you to cross the Z axis, so when MeshCAM creates the gcode and moves the position to positive Z to clear the work surface, your RepRap will toss this command and destruction will ensue. . .  Figure out your retract height, in my case I set it to 2.5mm so I can easily remember it.  You want to take this number, then set your stock size to fit geometry (or as needed), but make sure you add your retract height to the stock height and put it in the Z Position.

For example, I have a 5.08mm block I’m machining, with a 2.5mm retract height.  So I would define my Z Position as 5.08+2.50 or 7.58mm  This will result in your retraction remaining less than 0mm and the machine will actually retract away from the workpiece.
Dreamhost How to Use Cronjobs to Email Backup MySQL Databases

I’ve been using Dreamhost for a while (works great btw), I had been backing things up manually but I thought it was about time to start automated mysql backups. Looking around online I found these instructions but they simply say to modify the instructions and add this mutt command

mutt you@domain.com -a /home/username/backups/archives/mysql_backup.$suffix.tar -s "MySQL Backup"

to get e-mail backups working. In reality, this command will merely open up mutt and create a new message but it will not automatically send it without additional input. Buried online I found someone else who said to simply:

mutt you@domain.com -s "MySQL Backup" < /home/username/backups/archives/mysql_backup.$suffix.tar

which does automatically e-mail you, but it just dumps the file into the e-mail body without attaching it as a document. What that statement is really doing is piping in body text and completing the e-mail prompts magically, which isn’t what I wanted to do. The solution is to:

mutt you@domain.com -a /home/username/backups/archives/mysql_backup.$suffix.tar -s "MySQL Backup" < emailbody.txt

What this gives you is an attachment of your file, and then it pipes in an e-mail body (put it in the same location that this script is running from) and sends the message. You would also use echo statements to “type” whatever additional input you wanted in mutt and script the rest of the message completion [untested but it conceptually should work, YMMV]

Full Script:

#!/bin/bash
cd /home/username/backups/
mkdir mysql
suffix=$(date +%y%m%d)
mysqldump --opt -uUser -ppass -h mysqlA.domain.com db_nameA > mysql/db_nameA.$suffix.sql
mysqldump --opt -uUser -ppass -h mysqlB.domain.com db_nameB > mysql/db_nameB.$suffix.sql
tar -cf archives/mysql_backup.$suffix.tar mysql/*
mutt you@domain.com -a /home/username/backups/archives/mysql_backup.$suffix.tar -s "MySQL Backup" < emailbody.txt
rm -r mysql/

RepRap is Alive!

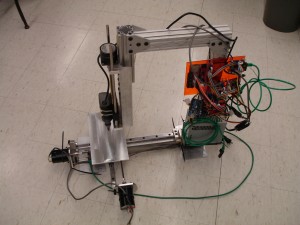
I’ve been wrenching for a few weeks to machine enough pieces to create a CNC plastic extruder (RepRap / Makerbot). I’ve got the CNC part done, now I have to get the extruder and heated bed up and running so I can start RPing parts.

Sector67 Forum Thread

I’ve gotten a few questions as to what you’re looking at, if you’re completely unfamiliar a visit to Wikipedia should clear things up.

It’s made out of 2″ x 2″ extruded aluminum channel, the railed looking stuff that makes up the top of the arm and the drop for the spindle (dremel) is called 80/20, it’s fairly expensive but is very precise and saves a lot of time for some projects.

The Z axis is the classic over constrained parallel rods, I pulled the rods out of a pair of identical printers and then drilled and reamed to size the end blocks and the slider block, which is just a chunk of delrin plastic. The bad part about using a plastic block for a sliding surface is that you have a drill/ream it over significantly to get it the right size, which in my case just means it’s sloppy and will be replaced by linear bearing when it becomes the weakest link in the machine for precision or stiffness.

The bottom end X-Y axes are THK precision linear bearing. I picked this out of discarded equipment at the university, which I understand it not available to “normal people”. I found out a few years after I picked it up that it’s $0.43/millimeter (yep, that’s a half of a dollar per the thickness of your fingernail, it’s expensive). The bearing carriages are ~$130/each. I was fortunate enough to find a pair of 18″ linear track and a pair of bearings still in their well oiled bags! They do have lash in them and should certainly be run in parallel or with a precision guide track for stiffness/rigidity but for my application (milling light plastics and depositing plastic in an additive process) it’s not a major concern this early in the project.

The other common question is how much does this thing cost. So far I have $199 for the full generation 3 Makerbot electronics (thanks Zach et al., they work great!) and $4.11 for 3 x 1″ long 1/4-20 nuts that are used on each of the axes (True Value). The rest has been collected or given to me by others.

These are a few of my favorite stores. . .

I’ve been meaning to post this for a while now 🙂

Electronics vendors:
Digikey (Excellent search function, expensive but very good pictures, lots of products too)
Mouser (lots of what digikey has but no pictures! Great for Delphi / Amphenol connectors)
Newark (bigger weirder stuff, careful some stuff ships from Farnell in the UK)
Jameco (Search is terrible, but if you can’t find it anywhere else. . .)
Allied Electronics (Cheap amphenol. . .)
Waytek (cheap for bulk connectors and wire, next day shipping)

Arduino:
Adafruit (cheap and usually has what I need, I’d rather pay a little more to support a still growing startup)
Sparkfun (expensive but a good one-stop-shop)

Electronics Surplus:
All Electronics

China Direct Electronics:
Futurlec (Cheap, good customer support, responsive, shipping takes a while – as indicated up front)
Deal Extreme (holy cheap, lots of people on eBay/discount stores are buying and drop shipping from them)
Sure Electronics (Lots of great cheap parts, you have to add them to your cart and check shipping after each item though, they’re making up some of their costs by charging shipping for each item – I received everything 3rd day after I ordered it though, which is amazing)
MPJA Ships from Florida, cheapest breadboard prices I’ve ever seen, not sure about anything else.

Materials:
McMaster-Carr (Expensive, ships quick, stocks a lot, great pictures/details on products, search rocks)
Grainger (Search sucks, plumbing stuff/etc much cheaper than McMaster, if you can find anything. . .)
MSC Direct (Tooling, industrial consumables)

Tools
Harbor Freight (If you’re on a budget you can’t get better than HF tools, but make sure you read the reviews)