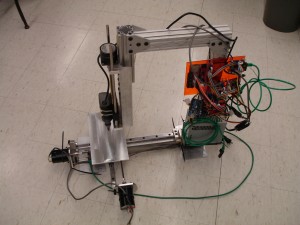
Warning – this post was sitting in the drafts, I don’t know how helpful it’ll be but it’s been sitting for 5 years – may as well release the information and hope it helps someone.
***
If anyone out there is running the RepRap / Makerbot gcode intrepreter for a CNC dremel / router / etc and is trying to use MeshCAM here’s some instructions:
Use MeshCAM as usual, but you’ll want to use this post script (you probably don’t actually need to print all of the XYZ commands when you’re not moving them, but it doesn’t hurt to do it, hence the @ rather than #):
; MeshCAM config

; This config is the basis for the minimum

; gcode output. If you're looking for

; the shortest output file then this is the config

; to start with.  Also show how to integrate CutViewer config into

; the output.

;

; 2/29/04 	Changed comments to be enclosed by () rather than start with ;

;		Added CutViewer config output

; 5/13/04 	Added toolchange gcode

; 2/12/05	Changed name and added units

; 3/17/05	Changed stock definition to use CUTVIEWERSTOCK variable

; 5/19/05	Removed feedrate command for rapid moves

; 5/25/05	Added dummy tool for CutViewer

; 6/27/05	Changed the formats to 1.4 to get 4 decimal places of accuracy

;

DESCRIPTION = "RepRap GCode-MM(*.nc)"

FILE_EXTENSION = "nc"

UNITS = MM

;Feeds

FORMAT = [F|@|F|1.1]

;Moves

FORMAT = [X|@|X|1.4]

FORMAT = [Y|@|Y|1.4]

FORMAT = [Z|@|Z|1.4]

;

START = "%"

START = "(FILENAME: [FILENAME])"

; The following is a dummy tool to keep CutViewer from generating an error when G20 is called without a tool

START = "(TOOL/MILL,0.1,0.05,0.000,0)"

START = "G21 ;Metric is good"

START = "([CUTVIEWERSTOCK])"

START = "G90 ;Absolute Positioning"

;

FIRST_RAPID_RATE_MOVE   = "G0 [X] [Y] [Z] [F]"

RAPID_RATE_MOVE        = "G0 [X] [Y] [Z]"

;

FIRST_FEED_RATE_MOVE   = "G1 [X] [Y] [Z] [F]"

FEED_RATE_MOVE         = "G1 [X] [Y] [Z]"

;

END = "(END)"

END = "(OF PROGRAM)"
Here’s a text version, make sure to rename the extension to .con and put it in your posts folder in the MeshCAM installation directory
Next up, open your STL/etc file, set up your tooling, and then the important part:
Your RepRap will not allow you to cross the Z axis, so when MeshCAM creates the gcode and moves the position to positive Z to clear the work surface, your RepRap will toss this command and destruction will ensue. . . Figure out your retract height, in my case I set it to 2.5mm so I can easily remember it. You want to take this number, then set your stock size to fit geometry (or as needed), but make sure you add your retract height to the stock height and put it in the Z Position.
For example, I have a 5.08mm block I’m machining, with a 2.5mm retract height. So I would define my Z Position as 5.08+2.50 or 7.58mm This will result in your retraction remaining less than 0mm and the machine will actually retract away from the workpiece.
