Category Archives: Mechanical Engineering

RepRap is Alive!

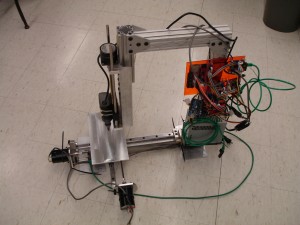
I’ve been wrenching for a few weeks to machine enough pieces to create a CNC plastic extruder (RepRap / Makerbot). I’ve got the CNC part done, now I have to get the extruder and heated bed up and running so I can start RPing parts.

Sector67 Forum Thread

I’ve gotten a few questions as to what you’re looking at, if you’re completely unfamiliar a visit to Wikipedia should clear things up.

It’s made out of 2″ x 2″ extruded aluminum channel, the railed looking stuff that makes up the top of the arm and the drop for the spindle (dremel) is called 80/20, it’s fairly expensive but is very precise and saves a lot of time for some projects.

The Z axis is the classic over constrained parallel rods, I pulled the rods out of a pair of identical printers and then drilled and reamed to size the end blocks and the slider block, which is just a chunk of delrin plastic. The bad part about using a plastic block for a sliding surface is that you have a drill/ream it over significantly to get it the right size, which in my case just means it’s sloppy and will be replaced by linear bearing when it becomes the weakest link in the machine for precision or stiffness.

The bottom end X-Y axes are THK precision linear bearing. I picked this out of discarded equipment at the university, which I understand it not available to “normal people”. I found out a few years after I picked it up that it’s $0.43/millimeter (yep, that’s a half of a dollar per the thickness of your fingernail, it’s expensive). The bearing carriages are ~$130/each. I was fortunate enough to find a pair of 18″ linear track and a pair of bearings still in their well oiled bags! They do have lash in them and should certainly be run in parallel or with a precision guide track for stiffness/rigidity but for my application (milling light plastics and depositing plastic in an additive process) it’s not a major concern this early in the project.

The other common question is how much does this thing cost. So far I have $199 for the full generation 3 Makerbot electronics (thanks Zach et al., they work great!) and $4.11 for 3 x 1″ long 1/4-20 nuts that are used on each of the axes (True Value). The rest has been collected or given to me by others.
AVL Smokemeter or Opacimeter Controller Software

If anyone is looking for a free terminal style controller for an AVL 415S Smokemeter or a AVL 439 Opacimeter I’ve posted the ones I use at work here.

You’ll want the very old school Terminal from Microsoft:

Microsoft TERMINAL

And the preset terminal buttons for the AVL 415S Smokemeter:

SMK_MCE

OR the LabVIEW interface for the AVL 415S Smokemeter:

LV Smokemeter Control
(Taken from this post)

And the preset terminal buttons for the AVL 439 Opacimeter:

OPACIMETER_TRM

OR the LabVIEW interface for the AVL 439 Opacimeter:

Opacimeter_Control
(Lightly modified from this one)

LabVIEW Shared Variable Engine

I spent more than 20 minutes trying to figure out the LabVIEW shared variable engine so it’s worth writing about.  My objective was to test the shared variable engine across multiple networked computers, if you are just trying to get the shared variable engine running this post applies to you as well, but you should not follow the steps to configure multiple computers.

The first note, is that they have a good page write up regarding shared variables here.  After reading a little bit about shared variables you should open up LabVIEW, go to:

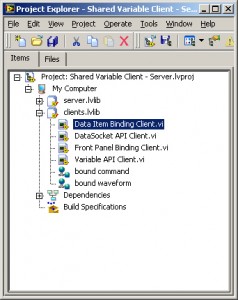
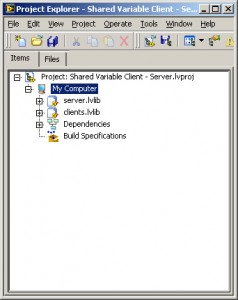
Help – Find Examples. . .  and search for shared.  This will bring up a list of shared variable examples.  Open up the “Shared Variable Client – Server.lvproj”.

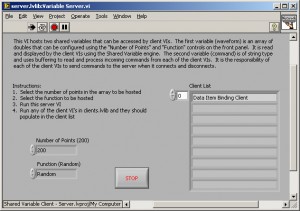
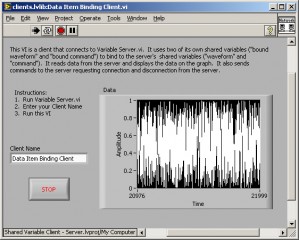
Now expand the server.lvlib and run “Variable Server.vi”.  Once you have this up and running, go back to the project explorer and now expand clients.lvlib and run any of the VI’s from this category – ie: “Data Item Binding Client.vi”.

Now you should have something that looks like:

Running Server

Client Receiving Data

Client Receiving Data

What’s happening is the LabVIEW project is sharing waveform information from the “server” in the form of TCP (I had UDP here, it’s clearly not as this would not have any confirmation of packet receipt – TCP vs. UDP) information packets and the “client” is listening to the waveform data and initializing communications by sending the server it’s Client Name.

If you want to get this example running across multiple computers you can see some useful information here.  The idea is that you need to now repeat the above steps on another computer, only this time DON’T open and run another server, we’re going to get the Client to read data from the other computer!

First step is to repeat the above and get the example project open on another computer.  Once you have the project opened up, let’s choose to get data from the other computer who is running now as a server.

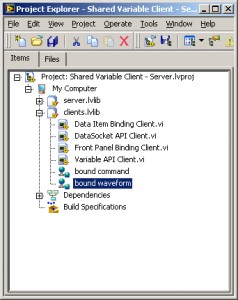
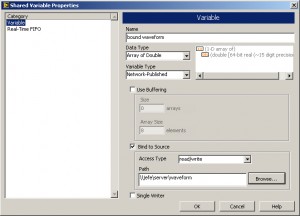
First double click the “bound waveform” variable so we can choose where to get data from.

Double Click Bound Waveform

Double Click Bound Waveform

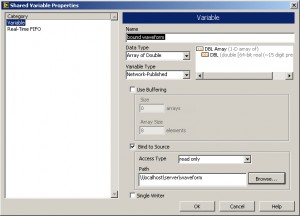
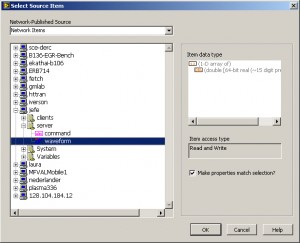
Now check the box “Bind to Source”, and click Browse… and find your other computer who is acting as the server.

Bind to Source; Browse. . .

Bind to Source; Browse. . .

Select Remote Server

Select Remote Server

Note Change in Binding

Note Change in Binding

Now go back and run any of the client VI’s and with any luck you should have data running from the server to each of the clients successfully!

Open a CLIENT on Another Machine

Open a CLIENT on Another Machine

If you create your own VI’s it’s very simple to create shared variables, just right click the project, go to new variable and configure it just as you’ve done above and you should be off and rolling in no time!